
Most campers assume a roaring campfire and a heavy cast-iron pan are all they need to eat well in the backcountry. That assumption has ruined more than a few trips. Fire bans, wet wood, unpredictable wind, and strict wilderness regulations can shut down your campfire plans before you even unpack. A dedicated backpacking stove changes the entire equation. It gives you reliable heat in seconds, consistent cooking results, and the freedom to cook anywhere, regardless of conditions. This guide breaks down exactly why backpacking stoves are worth the investment, which types suit different adventures, how to maximize performance, and how to keep your stove working trip after trip.
Table of Contents
- Why not just use a campfire? The unique benefits of backpacking stoves
- Types of backpacking stoves: Which one fits your adventure?
- Efficiency and performance: Getting the most from your stove
- Caring for your stove and packing smart: Tips for durability and convenience
- The backpacker’s advantage: Why stoves are non-negotiable for serious adventurers
- Find the perfect stove and more: Gear up for your next trip
- Frequently asked questions
Key Takeaways
| Point | Details |
|---|---|
| Stoves are safer | Backpacking stoves provide a controlled flame, reducing wildfire and accident risks, and are allowed during fire bans in most locations. |
| Tailor to your trip | Choosing the right stove type ensures efficient cooking whether you hike solo, camp in groups, or adventure in tough conditions. |
| Efficiency saves weight | Modern stoves use fuel efficiently, which frees up pack space and lightens your overall load. |
| Proper care extends life | Quick maintenance checks and smart packing keep your stove reliable on countless adventures. |
Why not just use a campfire? The unique benefits of backpacking stoves
Campfires feel iconic. There’s something primal about cooking over an open flame under the stars. But campfires come with serious limitations that experienced backpackers know all too well.
First, fire bans are increasingly common across the American West and many national forests, especially during dry summer months. If you’re counting on a fire for dinner and arrive to find a total fire restriction in place, you’re eating cold food or going hungry. Second, wet or scarce wood makes campfire cooking painfully slow and frustrating. Third, open fires are genuinely dangerous in dry, windy conditions.
Stove safety guidelines confirm that camp stoves reduce wildfire risk by offering safer, more controlled flames than open fires. That’s not just a safety preference, it’s increasingly becoming the law in many wilderness areas.
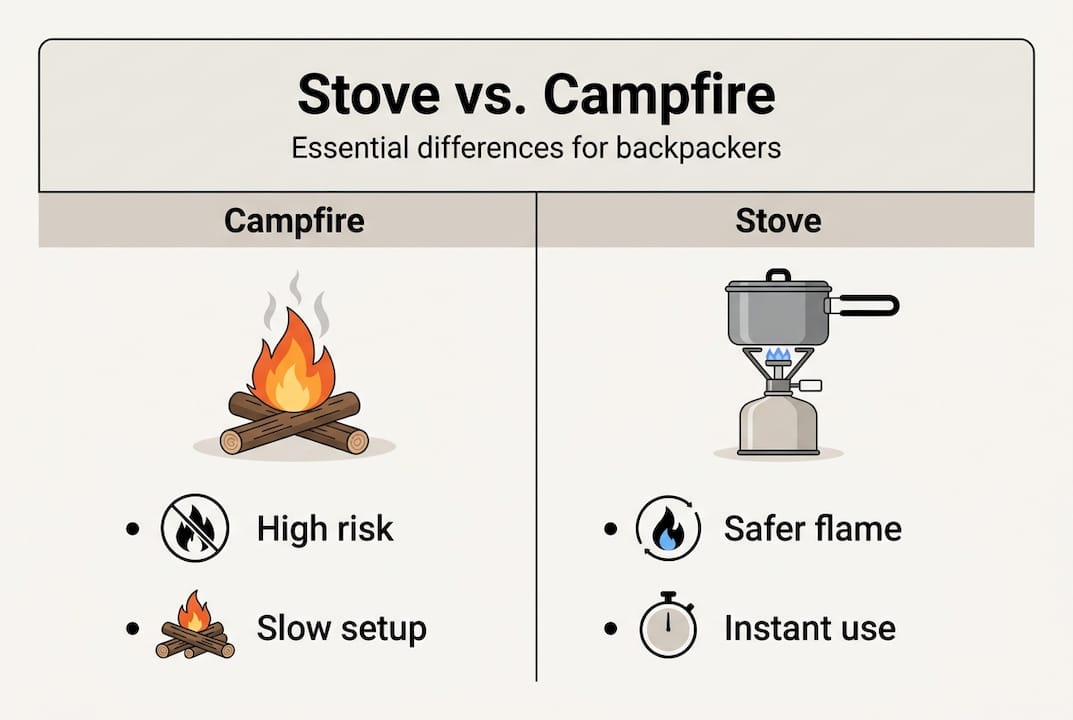
Campfire vs. backpacking stove: A quick comparison
| Feature | Campfire | Backpacking stove |
|---|---|---|
| Setup time | 10-30 minutes | Under 2 minutes |
| Safety | High wildfire risk | Controlled flame |
| Fuel control | None | Precise adjustment |
| Regulations | Often restricted | Usually permitted |
| Weight added | None | 2-14 oz |
The weight tradeoff is minimal, and the reliability gain is enormous. When you factor in your camping trip packing essentials, a compact stove often replaces heavier fire-starting gear and bulky cookware.
When you should use a stove instead of a campfire:
- Active fire bans or high fire danger alerts
- Above treeline where wood is unavailable
- Wet or rainy conditions making fire impractical
- Leave No Trace zones requiring minimal impact
- Time-sensitive cooking needs at camp
- Windy conditions that make open flames unpredictable
Modern backpacking stoves light instantly, simmer precisely, and work in rain, wind, and cold. A campfire simply cannot compete on those terms.
Types of backpacking stoves: Which one fits your adventure?
Not all backpacking stoves are built the same. Choosing the right one depends on your trip length, group size, destination climate, and personal cooking style.
As backpacking stove comparisons show, stoves excel in different conditions, from ultralight canister models for solo hikers to multi-fuel options for expedition groups. Here’s a breakdown of the main types:
Backpacking stove types compared
| Type | Pros | Cons | Best for | Cold/wind performance |
|---|---|---|---|---|
| Canister | Easy to use, lightweight | Fuel hard to find remotely | Weekend trips | Moderate |
| Liquid fuel | Versatile, refillable | Heavier, complex | Expeditions, cold climates | Excellent |
| Alcohol | Ultralight, cheap | Slow, no simmer control | Ultralight hikers | Poor |
| Solid fuel | Minimal weight | Very slow, limited heat | Emergency backup | Poor |
| Integrated system | Fast boil, efficient | Expensive, bulky | Groups, comfort campers | Good |
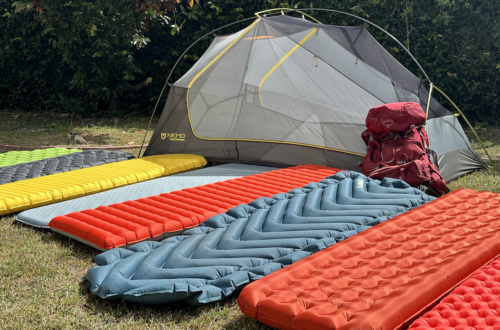
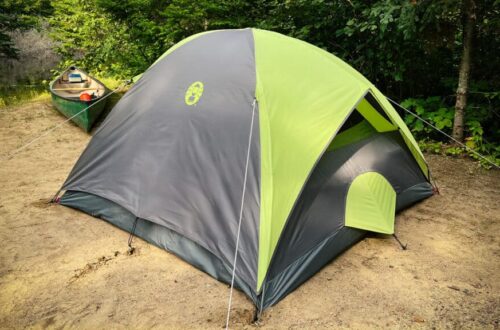
Pairing the right stove with quality top camping cookware makes a significant difference in how efficiently you cook. And if you’re already investing in lightweight backpacking tents, matching your stove to your overall pack weight strategy is smart planning.
How to choose the right stove in 5 steps:
- Identify your typical trip length and group size
- Research fuel availability at your destination
- Check the expected temperature range for your adventure
- Set a weight budget based on your total pack goals
- Match the stove type to your cooking style (boiling only vs. full meals)
Pro Tip: Before committing to a stove type, look up whether canister fuel is sold near your trailhead. In remote areas, liquid fuel stoves that accept white gas or unleaded fuel give you far more flexibility.
Efficiency and performance: Getting the most from your stove
Once you’ve narrowed your choices, focus on efficiency and performance features to maximize every meal outdoors.
Not all stoves burn fuel at the same rate, and that gap matters more than most beginners expect. Efficiency can double meal output and cut pack weight by up to 1 lb on multi-day hikes, according to high-efficiency stoves review data. That’s a meaningful difference when every ounce counts.
Fuel-efficient stoves can save up to 8 oz of fuel per 5-day trip compared to lower-efficiency models. Over a week-long route, that’s enough weight savings to matter for ultralight hikers.
Top performance features to look for:
- Boil time: Look for under 3.5 minutes per liter as a benchmark for fast cooking
- Simmer control: Essential for anything beyond boiling water, like sauces or oatmeal
- Wind resistance: Integrated windscreens or recessed burners dramatically cut fuel waste
- Cold-weather reliability: Some canister stoves underperform below 20°F, so check specs carefully
- Piezo igniter: Built-in ignition saves you from fumbling with wet matches at altitude
- Pot support stability: Wider supports handle larger pots without tipping
Pro Tip: Using campfire cookware picks that are specifically designed for backpacking stoves, with flat bottoms and heat-concentrating lids, can reduce your boil time by 20% or more. That means less fuel burned and faster meals after a long day on trail.
Also consider your best hiking backpacks setup when sizing your stove. A stove that nests inside your cook pot saves space and keeps your pack organized. Integrated systems like the Jetboil Flash are bulkier but deliver unmatched speed for boil-only cooking.
Caring for your stove and packing smart: Tips for durability and convenience
A reliable stove is only as good as its care and integration into your packing system.
Regular stove maintenance extends lifespan and prevents failures during trips, according to stove maintenance tips from experienced backpackers. A stove that fails mid-trip is more than an inconvenience. In cold or wet conditions, it’s a safety issue.
Basic maintenance checks before every trip:
- Inspect the burner head for clogged jets or debris
- Check all O-rings and seals for cracks or wear
- Test the piezo igniter and carry backup matches regardless
- Verify the fuel canister valve threads smoothly without resistance
- Run a short test burn at home before packing
For liquid fuel stoves, also clean the fuel line and prime pump before heading out. Alcohol stoves need little maintenance but check for cracks or warping in the burner body.
“If your stove fails mid-trip, stay calm. Try cleaning the jet with the included tool, check for a clogged fuel line, and if it’s a canister stove, warm the canister in your hands or jacket pocket in cold weather. Always carry a backup lighter and consider a small solid-fuel tablet as an emergency option.”
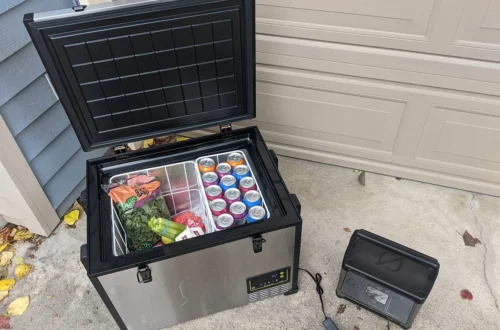
For packing, store your stove inside your cook pot to save space and protect the burner. Keep fuel canisters upright and away from sharp objects. If you’re packing for longer adventures, pair your stove setup with well-organized long trip coolers to create a complete, efficient camp kitchen system.
Routine cleaning after each trip, brushing the burner, wiping down the body, and checking connections, adds maybe 10 minutes to your post-trip routine and can extend your stove’s life by years.
The backpacker’s advantage: Why stoves are non-negotiable for serious adventurers
Here’s the honest truth that most gear guides won’t tell you: almost every experienced backpacker who once skipped a stove to save weight has a story about regretting it. It’s practically a rite of passage.
You hike 15 miles, arrive at camp exhausted, and discover the fire ban you didn’t check for. Or it’s raining sideways and your fire-starting skills mean nothing. Or you’re above treeline and there’s simply no wood. That’s the moment a stove stops being optional gear and becomes the most important thing in your pack.
The real cost of skipping a stove isn’t the ounces saved. It’s the cold, demoralizing meals that kill trip morale. Food is fuel, but it’s also comfort and reward after hard miles. Even the most minimalist backpackers, the ones counting grams obsessively, tend to keep a stove after one bad experience without one.
Investing in a quality stove upfront is far cheaper than a ruined trip. And as you dial in your packing tips for new backpackers, you’ll find the stove becomes one of the last things you’d ever consider leaving behind.
Find the perfect stove and more: Gear up for your next trip
Ready to upgrade your camp kitchen experience? Choosing the right stove is just the start of building a reliable outdoor cooking setup.
At OutdoorPatron.com, we’ve done the research so you don’t have to. Explore our guide to the best cookware sets to pair perfectly with your new stove, or use our comprehensive packing guide to make sure nothing gets left behind. Whether you’re planning your first overnight or your tenth thru-hike, our all outdoor gear picks cover everything from shelter to cookware. Quality gear makes every meal taste better and every mile feel worth it.
Frequently asked questions
What type of fuel is best for backpacking stoves?
Canister fuel is the most user-friendly and widely available option for most trips, but liquid fuel is the better choice for cold climates or high-altitude adventures where stoves excel in different conditions.
How do I clean and maintain a backpacking stove?
Let your stove cool completely, disassemble it as the manual directs, brush off debris from the burner, and inspect for worn seals or parts. Regular maintenance before and after each trip keeps it reliable.
Are backpacking stoves allowed everywhere?
Most parks and wilderness areas allow stoves even during active fire bans, but always verify local regulations before your trip. Stove use is preferred for safety and is often permitted when campfires are not.
What features should I look for in a backpacking stove?
Prioritize fast boil time, wind resistance, cookware compatibility, and a size that fits your group. Performance and features vary widely by model, so match specs to your specific trip conditions.
How long will backpacking stove fuel last?
A standard 8 oz canister typically lasts 3 to 5 days for a solo camper using an efficient stove under moderate cooking conditions, though cold weather and wind can reduce that significantly.