
A poorly packed backpack can turn a dream hike into a painful slog. You’ve felt it before: sore shoulders by mile two, digging through your entire pack just to find a snack, and that nagging feeling that your load is pulling you backward. Whether you’re heading out for a quick day hike, a multi-day camping trip, or an extended adventure travel journey, how you pack matters just as much as what you pack. This guide walks you through every step, from choosing the right backpack to loading it like a pro, so you can focus on the trail instead of your gear.
Table of Contents
- Choose the right backpack and understand your needs
- Gather essential gear and organize with packing zones
- Master the step-by-step packing process
- Avoid common mistakes and troubleshoot on the trail
- Our perspective: The art and personal touch of backpack packing
- Next steps: Gear up for your next adventure
- Frequently asked questions
Key Takeaways
| Point | Details |
|---|---|
| Start with the right backpack | Choosing a properly sized and fitted backpack is the foundation of an enjoyable outing. |
| Pack by zones and priorities | Grouping and locating your gear strategically means greater comfort and efficiency. |
| Balance weight for safety | Heavier items close to your back and lower center of gravity reduce injury risk. |
| Troubleshoot as you go | Make quick adjustments and repack if needed to prevent discomfort and keep essentials accessible. |
Choose the right backpack and understand your needs
With the challenges of poor packing in mind, let’s start with selecting the right backpack for the job. Before you even think about what to put inside, you need the right container. Grabbing the first backpack you see is one of the most common mistakes hikers and campers make.
The right backpack size and fit depend on your torso length and the type of activity you’re planning. A 20-liter daypack is perfect for a short trail, but it will leave you scrambling on a five-day wilderness trek. Use this table to match your trip to the right pack size:
| Trip type | Recommended capacity | Example use |
|---|---|---|
| Day hike | 15 to 30 liters | Trail snacks, water, light layers |
| Weekend camping | 30 to 50 liters | Tent, sleeping bag, two nights of food |
| Multi-day trek | 50 to 70 liters | Full camp setup, several days of supplies |
| Extended expedition | 70+ liters | Remote travel, heavy gear, long durations |
Beyond capacity, fit is everything. A pack that sits wrong on your frame will cause pain no matter how well you organize it. Torso length, not your height, determines the correct frame size. Most quality packs are adjustable, which helps, but you need to measure your torso from the C7 vertebra at the base of your neck to the top of your hip bones.
For those exploring best hiking backpacks across different categories, knowing these measurements before you shop saves a lot of guesswork.
Pro Tip: Always try on a backpack with weight in it before buying. Most outdoor retailers will let you load the pack with sandbags. Walk around the store, check for pressure points, and test the hip belt. An empty pack feels nothing like a loaded one.
Here’s what to look for when evaluating a backpack:
- Hip belt: Should carry 70 to 80 percent of the pack’s weight off your shoulders
- Adjustable torso length: Critical for a personalized fit
- Multiple compartments: Helps with organization and quick access
- Load lifter straps: Pull the top of the pack closer to your body for balance
- Ventilated back panel: Reduces sweat and improves airflow on long hauls
- Weather-resistant material: Protects gear in light rain or unexpected conditions
For cold or wet weather trips, also consider packs with built-in rain covers or hydration reservoir sleeves. These small features make a big difference when conditions change fast.
Gather essential gear and organize with packing zones
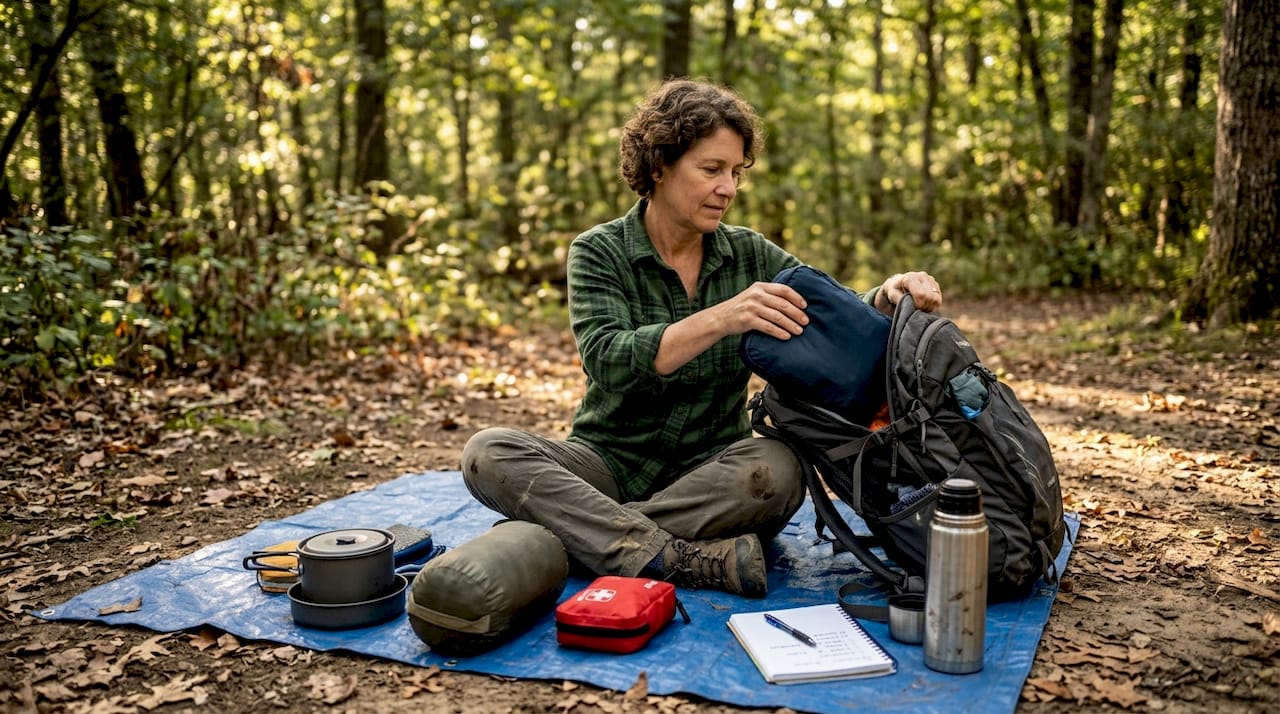
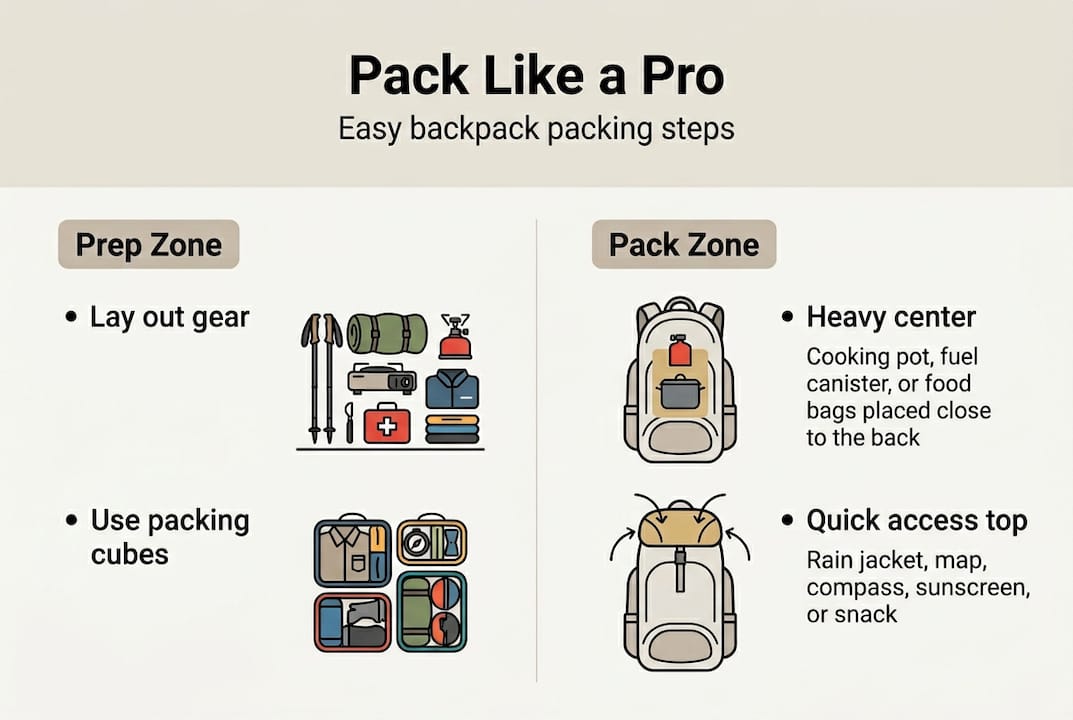
Once you’ve selected your backpack, the next step is gathering and organizing what you’ll pack. Laying everything out on the floor before it goes into the bag is a game-changer. You’ll immediately spot duplicates, unnecessary items, and things you almost forgot.
A solid camping gear checklist is your best starting point. From there, sort your gear into zones based on weight and how often you’ll need it. Grouping gear by frequency of use and weight optimizes both accessibility and pack balance.
| Gear category | Examples | Packing zone |
|---|---|---|
| Sleep system | Sleeping bag, pad, pillow | Bottom |
| Camp kitchen | Stove, fuel, cookware, food | Middle |
| Clothing | Layers, rain gear, extra socks | Middle to top |
| Navigation and safety | Map, compass, first aid kit | Top or lid |
| Quick-access items | Snacks, sunscreen, headlamp | External pockets |
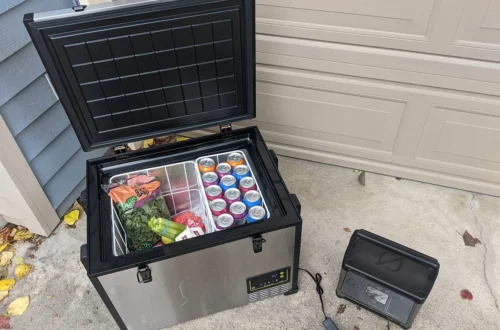
For camp cooking specifically, investing in quality camping cookware sets that nest together saves a surprising amount of space and weight.
Here’s a simple step-by-step process for sorting your gear before packing:
- Lay every item you plan to bring on a flat surface
- Group items into the five categories above
- Weigh each group if possible, aiming for a total load under 20 percent of your body weight
- Eliminate any item that serves only one purpose or has a lighter alternative
- Assign each group to its packing zone before anything goes into the bag
- Roll or compress soft items like clothing and sleeping bags to save space
Pro Tip: Use color-coded packing cubes or stuff sacks for each category. When you need your rain jacket fast, you’ll grab the right sack without unpacking everything else. This system also makes repacking at camp much faster.
Following this zone system consistently means you’ll always know where things are, even in the dark or in a rush.
Master the step-by-step packing process
With your gear sorted, here’s how to actually load your backpack for peak comfort and balance. The order you pack in is not random. It directly affects how the pack sits on your body and how your joints feel after ten miles.
Heavy items placed close to your back provide stability and keep your center of gravity where it belongs. When heavy gear sits far from your spine, you naturally lean forward to compensate, which strains your lower back and knees.
Follow these steps when loading your pack:
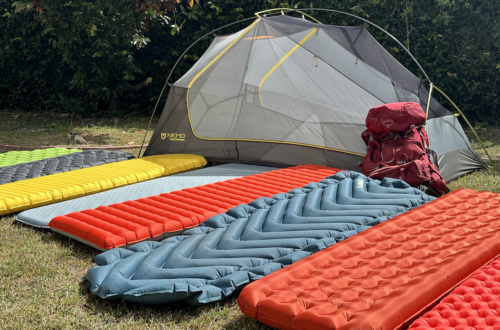
- Bottom zone: Pack your sleeping bag and sleeping pad first. These are bulky and light, so they form a stable base. Lightweight backpacking tents can also go here if they’re compact enough.
- Middle zone (against your back): Load your heaviest items here. Food, water, stove fuel, and a bear canister if required. Keep this layer tight against the back panel.
- Middle zone (away from back): Softer, medium-weight items like clothing layers and camp shoes fill this space.
- Top zone: Bulky but light items go here. Think puffy jackets, rain gear, and your camp towel.
- External pockets: Reserve these for items you’ll grab constantly: snacks, sunscreen, a headlamp, your phone, and a small first aid kit.
- Lid or top pocket: Map, permits, emergency contacts, and anything you might need without stopping.
Safety note: An unbalanced pack shifts your body’s center of gravity and increases your risk of falls on uneven terrain. Always check that the load feels centered and stable before heading out, especially on technical trails.
After loading, put the pack on and adjust every strap in order: hip belt first, then shoulder straps, then load lifters, then the sternum strap. This sequence ensures weight transfers correctly to your hips. Walk a short distance and make small adjustments until the pack feels like it’s part of your body.
Use compression straps on the sides to cinch the load tight and prevent gear from shifting mid-hike.
Avoid common mistakes and troubleshoot on the trail
Even after careful packing, issues can arise on the trail. Knowing how to spot and fix them quickly keeps your trip on track.
The most common packing mistakes hikers make include:
- Overpacking: Bringing gear for every possible scenario adds weight without real benefit. Be ruthless about what earns a spot in your pack.
- Poor weight balance: Heavy items packed too low or too far back throw off your posture and create fatigue fast.
- Burying essentials: Putting your rain jacket at the bottom when rain is likely means a full unpack in a downpour.
- Skipping compression: Loose gear shifts during movement, making the pack feel heavier than it is.
- Ignoring wet conditions: Failing to waterproof your pack is a mistake you only make once. Consider waterproof backpack options or pack a rain cover for wet environments.
Re-adjusting straps and shifting weight during breaks can significantly reduce fatigue and soreness over a long day. Don’t wait until you’re in pain to make changes.
If your shoulders are burning after an hour, the hip belt probably isn’t carrying enough weight. Stop, loosen the shoulder straps slightly, and re-tighten the hip belt so it sits firmly on your hip bones. If your lower back aches, your heavy items may have shifted away from your spine. Take five minutes to repack at the next break.
Pro Tip: At the first sign of discomfort, stop and repack rather than pushing through. Small adjustments made early prevent the kind of soreness that cuts trips short. A ten-minute fix at mile three beats suffering through mile fifteen.
For rainy conditions, line the inside of your pack with a garbage bag before loading. It’s cheap, light, and far more reliable than relying on a pack’s built-in water resistance alone.
Our perspective: The art and personal touch of backpack packing
Now that you’ve seen the techniques and problem-solving tips, here’s a seasoned outdoors perspective on finding your personal packing approach.
After years on the trail, we’ve come to believe that packing is less about following a perfect system and more about learning to read your own body and trip style. The frameworks in this guide are starting points, not rules carved in stone. Every hiker eventually develops their own quirks: the person who always keeps a specific snack in the left hip belt pocket, or the camper who packs their rain gear on top regardless of the forecast.
The most valuable lesson we’ve learned is this: reflect after every trip. What did you never touch? What did you desperately wish you had? That feedback loop, repeated over dozens of trips, builds intuition that no checklist can replicate.
Creative packing has genuinely saved the day for us more than once. A stuff sack repurposed as a camp pillow. A compression bag that doubled as a dry bag during an unexpected river crossing. These solutions don’t come from memorizing rules. They come from experience and paying attention.
If you’re still figuring out which pack works best for your style, keep exploring backpack options until something clicks. The right pack for your body and your adventures makes every technique in this guide work better.
Next steps: Gear up for your next adventure
Ready to put this advice into action? Find your ideal gear and more support below.
OutdoorPatron.com has everything you need to move from reading to doing. Start with our detailed camping trip packing guide for activity-specific gear lists that take the guesswork out of preparation.
If you’re still searching for the right pack, our roundup of best backpacks for day hikes covers top picks across budgets and body types. And when you’re ready to go deeper on gear, tips, and trail-tested advice, explore more outdoor tips across our full library of guides. Your next great adventure starts with the right preparation, and we’re here to help you get there.
Frequently asked questions
What items should always go at the bottom of my backpack?
Bulky, lightweight items like sleeping bags and pads belong at the bottom, while heaviest items belong near your mid-back for proper balance and stability.
How do I prevent my backpack from hurting my shoulders?
Distribute heavy items close to your back and use your hip belt to carry most of the load. Proper weight distribution and strap adjustments can significantly reduce shoulder soreness over long distances.
Do I need a special waterproof solution for my backpack?
A rain cover or waterproof stuff sacks work well for most conditions. Waterproof covers and sacks safeguard your gear reliably against wet weather without adding much weight.
How can I quickly find essentials during a hike?
Pack snacks, first aid supplies, and navigation tools in your top lid or external pockets. Quick-access pockets are critical for keeping small essentials within reach without stopping to dig through your pack.
What’s the best way to lighten my backpack?
Choose multi-use items, cut backup gear, and question every item before it goes in. Pack only what you truly need to keep your load manageable and your body feeling strong on the trail.